Smart Range ProfilerSmart Market Structure Viewer: Gaps, Swings & Dealing Ranges
Overview
This script is a comprehensive technical analysis viewer designed to provide a clear and objective visualization of market structure. By mapping liquidity gaps, multi-tier swing points, and dynamic dealing ranges, it helps traders identify key institutional levels and price action context without the clutter of predictive signals.
Key Features
1. Gap Analysis (FVG & Breakaway)
The tool identifies and tracks price imbalances to help visualize market inefficiency:
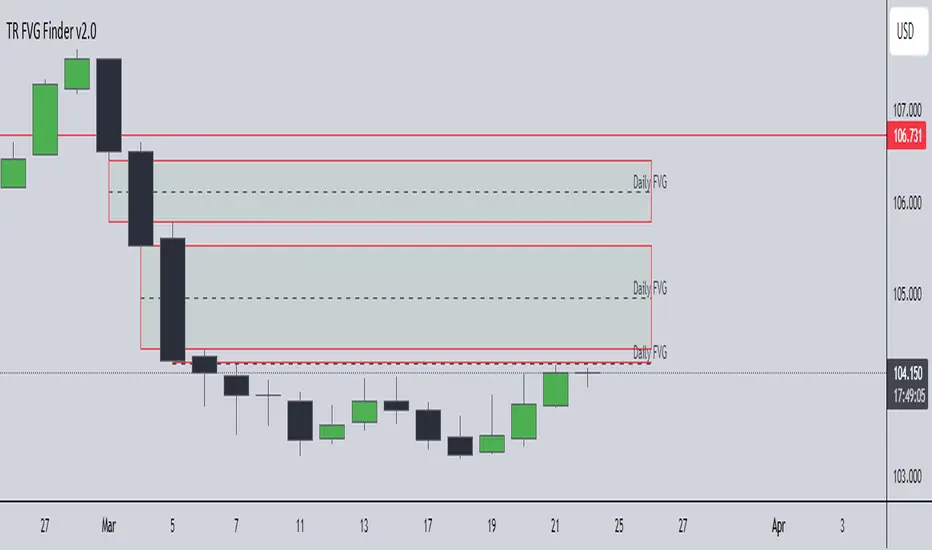
Fair Value Gaps (FVG): Highlights standard price imbalances.
Breakaway Gaps: Specifically marks gaps where the candle close remains outside the previous range, indicating strong directional commitment.
Sophisticated Mitigation: Users can choose how gaps are cleared from the chart (e.g., when price touches, leaves, or completely covers the gap), ensuring only relevant imbalances are displayed.
2. Hierarchical Swing Points
To help distinguish between minor fluctuations and major trend shifts, the viewer categorizes market structure into three hierarchical levels:
Short-Term (ST): Localized swing points identified in relation to gap formations.
Intermediate-Term (IT): Structural points derived from the relationship between short-term swings.
Long-Term (LT): High-level structural points that define the broader market framework.
3. Dynamic Dealing Range & Profiling
The script calculates and projects the current "Dealing Range" based on the selected structural hierarchy (ST, IT, or LT).
Range Geometry: Displays the Range Top, Range Bottom, and the Equilibrium (50%) level.
MTP (Most Traded Price): A volume-based profile indicating the price level with the highest trading activity within the current range.
MTS (Most Time Spent): A time-based profile highlighting the price level where the market spent the most duration.
How to use this Viewer
Structural Context: Use the multi-tier swings to identify the current market phase (Bullish/Bearish) and seniority of the trend.
Imbalance Tracking: Monitor how price interacts with Fair Value and Breakaway gaps to gauge the strength of a move.
Premium vs. Discount: Utilize the Dealing Range Equilibrium in conjunction with MTP/MTS levels to identify where price sits relative to its value distribution.
Indicador Pine Script®