PROTECTED SOURCE SCRIPT
Trap Zone Lite – Shinobi Lab
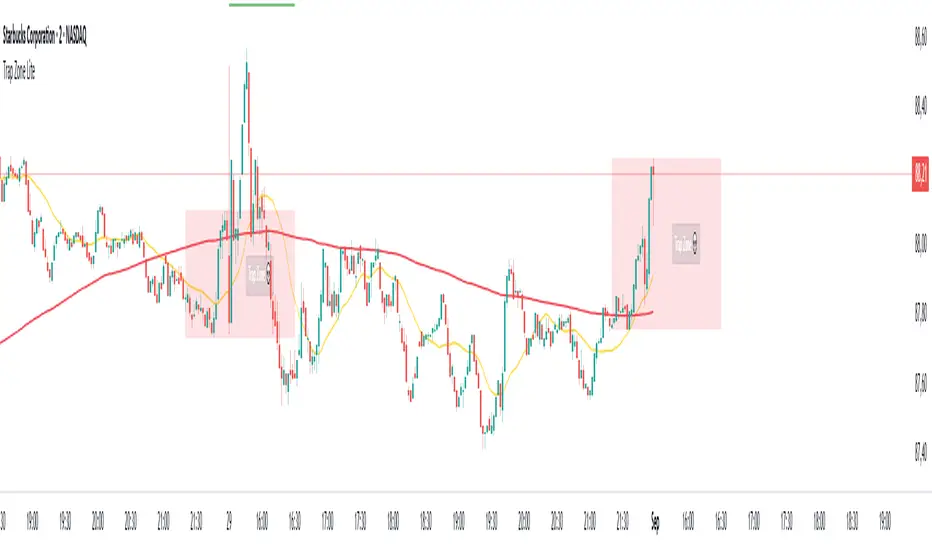
This indicator is designed for day traders, especially on lower timeframes such as the 2-minute chart. It highlights the Trap Zone: an area of congestion created by the 20-period moving average, the 200-period moving average, and the previous day’s closing price. This zone often acts as a heavy area of support or resistance where price can stall or trap participants.
What it shows:
A shaded Trap Zone box (congestion zone).
Two boundary lines that extend outward from the zone:
Zone + (above the trap) → context for bullish confirmation. A long signal forming here has stronger reliability.
Zone – (below the trap) → context for bearish confirmation. A short signal forming here has stronger reliability.
How to use:
The Trap Zone is meant as context, not signals. Traders should avoid taking setups inside the zone due to congestion. The value comes from using the boundaries:
Avoid shorting in Zone + (too much overhead resistance from prior day close + MAs).
Avoid longing in Zone – (too much downward pressure).
Focus on confirmations that occur outside the trap zone for higher-quality setups.
Script protegido
Este script se publica como código cerrado. No obstante, puede utilizarlo libremente y sin ninguna limitación. Obtenga más información aquí.
Shinobi Trading Lab – Indicators • Stats • Discipline
👉 Patreon: patreon.com/ShinobiTradingLab
👉 Patreon: patreon.com/ShinobiTradingLab
Exención de responsabilidad
La información y las publicaciones no constituyen, ni deben considerarse como asesoramiento o recomendaciones financieras, de inversión, de trading o de otro tipo proporcionadas o respaldadas por TradingView. Más información en Condiciones de uso.